|
Rating

|

Here I find myself a year older and not much done on my projects.  Seems thats how it goes. But not all is lost. I have started to build the Dumas kit USS Crockett. This is the second time I've built this model. The USS Crockett was the first model I did for this website back in 1998. Along time has passed since then. Because it was the first, I didn't really know what I needed to post on the website. Over the years and hundreds of emails later, I know. So because the first USS Crocket build was lacking a bit in pictures and such I am going to design new website on the build. I have had contact with some of the orignal crew members of the Crockett and have allot of data about the ship to pass on. You can follow along with the build and see what I've done at the link below: Seems thats how it goes. But not all is lost. I have started to build the Dumas kit USS Crockett. This is the second time I've built this model. The USS Crockett was the first model I did for this website back in 1998. Along time has passed since then. Because it was the first, I didn't really know what I needed to post on the website. Over the years and hundreds of emails later, I know. So because the first USS Crocket build was lacking a bit in pictures and such I am going to design new website on the build. I have had contact with some of the orignal crew members of the Crockett and have allot of data about the ship to pass on. You can follow along with the build and see what I've done at the link below:NEW USS CROCKETT WEBSITE
It has been a few months since I have last worked on my USS SPRUANCE. It has been sitting on the building table waiting for me to return.  Well, time away has seen me building on my TopFlite R/C model air plane kits (yep, two of them) and spending hours in front of the computer trying to learn to fly by using "RealFlight". Well, time away has seen me building on my TopFlite R/C model air plane kits (yep, two of them) and spending hours in front of the computer trying to learn to fly by using "RealFlight".  Well... I don't see myself heading out to the flying field until the warmth of Spring returns... So I am going to spend some long over due building time on my ships. Oh yes... and I still have a "Mister Darby" unbuilt kit to think about also! Well... I don't see myself heading out to the flying field until the warmth of Spring returns... So I am going to spend some long over due building time on my ships. Oh yes... and I still have a "Mister Darby" unbuilt kit to think about also!  I will post more information and more pictures in the upcoming weeks. 
Well, here is some pictures of the work I was doing on the superstructure.  The picture above shows the filler added after the styrene was applied. After the primer is applied and sanded I will have a great surface for paint. If you look close to the end of the stack house you can see some "fuze" still on the basswood. After this is sanded these will be covered with styrene also.  Another view. Walkways and other details will be added later.  Cutout made for the starboard forward RAS cutout. The fitting is from SIRMAR.  The plastic parts in this picture look "warped" but they are NOT. This is a bad picture and I need to post a new one later. I have not been spending much time at all working on my model ships. What time I do have is going to a R/C Cessna 182 Skylane I am working on! 
Things are moving along with the superstructure. I spent most of yesterday gluing on the 0.010” plain styrene sheet to the basswood. Although it is really a “pain in the ass” the results are worth the effort. I am using Walthers Goo® to glue the styrene to the basswood. I apply a thin coat to each surface, let each one dry for about two minutes then apply. I then sand the edges flush and add filler where needed. I should be done with applying the styrene skins a lot sooner than I thought it would take me. I am holding off on applying the four sides that have the RAS cutouts, these I will do last. I should be able to apply some 0.005” reinforcement to the cut outs as on the full sized ships. We will see. I will also post some pictures soon also. The applied styrene sheets have worked giving me a great surface to apply paint. I have had no delamination or ripples in the applied styrene surface. I will have to wait an see IF this becomes a problem with time.
Here is some stuff I did over this weekend. The forward section starting to take shape. Although there is a lot more I need to build.  Another angle. (The forward section is NOT glued to the rear section yet.)  Now here I am working on the stack house. 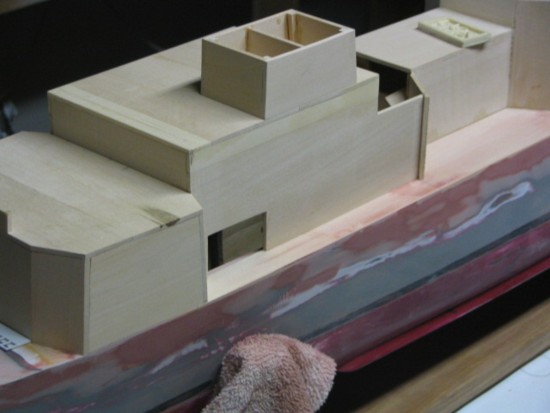 Here I marked the radius that I needed to make.  The stack house sanded and ready for the top deatils to be added. I made two of these.  More posts soon...
It's been awhile since my last post. Over the past week I have been working on the superstructure for the USS Spruance. I have moved on to building the forward section. Here I am starting to frame up the starboard side. (Note where the RAS cut out goes)  Glued and clamped.  More progress... (I think)  Here I am starting to layout the forward section. There are a few tricky angles on the forward section. The plans were a help although my hull didn't match plans. Because of this, I had to make changes to allow the forward section to match my hull. Also note where I made allowance for the thickness of the wood in my measurements.  More posts soon
Work is moving along on the USS Spruance. More detailed information about this project can be found in the USS Spruance Project Area of this website. I have an December 1997 issue of Fine Scale Modeler. In this issue, Al Kalbfleisch built a 1/96 scale model of CG-63 USS Cowpens. He used a fiberglass hull, plans and fittings from The Scale Shipyard. What caught me was how he built the superstructure. He built the superstructure out of basswood with sheet styrene skin that was bonded with Goop. Since I built the hull from wood, I thought that building the superstructure out of wood would be a good idea. I plane to use Midwest brand basswood, evergreen .010 plain sheet styrene and Walthers Goo® to adhere the styrene skin to the basswood. Here are some quick pictures showing some of the building so far: 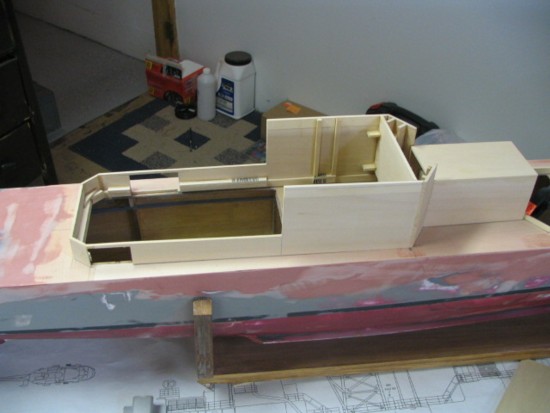  More soon.
I have finished with this model. The person who I was building this for did not want me to apply the "Atlas" decals. After I finished with the hydraulic hoses I inspected the crane and touched up any small areas. Here are some pictures of the finished crane. The pliers in the picture keep the crane from "tipping". The crane is boom heavy. 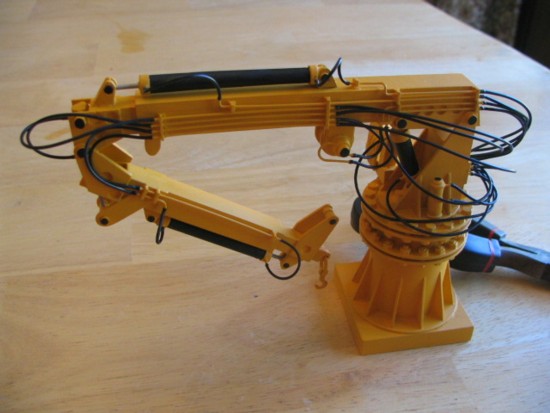 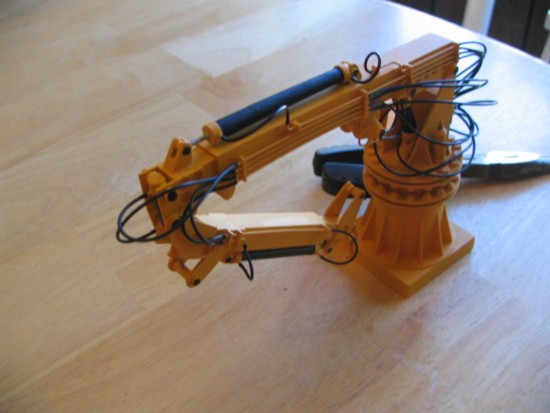       I did not add the railings. The fellow modeler will add these when he gets the crane.  I wrapped the crane in packing and boxed it up. I used lots of packing, we all know what the post office can do! I hope it's new owner enjoys it. Sad to see it go. If you would like to build this kit, you can get it from Harbor Models. This is almost the same kit as what Model Slipway offers. Harbor Models gets the bulk of the kit from Model Slipway (except the printed styrene sheet) and adds their own laser cut styrene sheet! This makes the kit much easier to build. Plus it save time during the construction process.
After the yellow had dried I painted the black and silver on the rams. This was not as hard as I thought it would be with them already glued to the booms. I also painted the ram I did not apply to the main boom. It was even easier to paint... (Dah) then glued it to the main boom and glued together the booms.  Next came adding the hydraulic hoses to the crane. A coil of hose came with the kit... plenty of it! It's good to have a little extra for those repairs in the future.   I started to add the hoses. I first dipped the hose in CA and then slid then onto the hydraulic pipes.  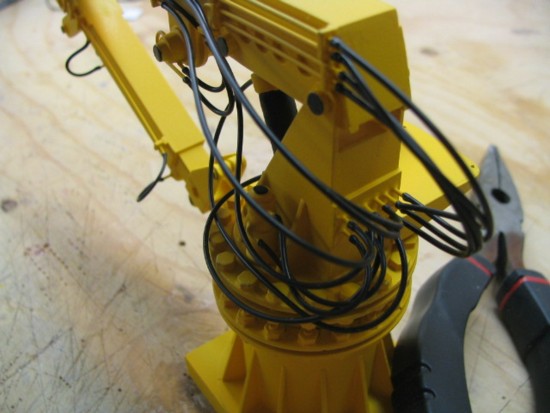 Close-up of the hoses.  Almost done with the hoses!  close-up view of the pivot ram. Here is the pivot ram with the hydraulic hoses. Now I am really close to being done.
 I added flat white primer to the crane. After the primer had dried I went over the parts looking for areas I needed to "fill". I sanded the filler and ensured I had a nice smooth surface. Some areas needed to be gone over with 400 grit. I cleaned off the sanding dust and applied another coat of primer. The resanded and looked for areas that needed to be filled.  After I finished with the primer, I let it dry for 12 hrs. I tend to ensure the primer is good and dry before I apply the top coat. If you apply several layers of paint on top of each other you can get cracking. This happens when the layers of paint dry at different rates. If you ensure each layer is 100% dry before you apply another on top you will never have this problem. I used my air brush to apply the Model Master Insignia Yellow FS 33538. The white primer really made the color "pop".   Another view of the turret.  Picture of the other booms. Note: The rough areas are filler I added to ensure a snug fit inside the main boom. When the booms are slid together you will not see this area. A "THANKS" to the wife for holding this part while I took the picture. |
Last entries
Another year has passed!
Time to start work again? USS Spruance Superstructure USS Spruance Superstructure USS Spruance Superstructure USS Spruance Superstructure USS Spruance Superstructure Building the ATLAS 5-Ton Hydraulic Deck Crane Building the ATLAS 5-Ton Hydraulic Deck Crane uilding the ATLAS 5-Ton Hydraulic Deck Crane Last Comments
4 user(s) viewing
4 guest(s)
0 member(s) 0 anonymous member(s) Search My Blog
Categories
My Blog Links
|


 Sep 27 2007, 01:02 PM
Powered By IP.Blog
1.3.3 © 2024 IPS, Inc.